In the previous
post we created a basic MVVM WPF application; in this post we will add a Unit
Tests project to the same solution and implement an Unit Test using NUnit.
Your solution explorer should look like this
at the end of this tutorial:
Get NUnit
Installed
Download the
latest installer (This will add the NUnit libraries to the GAC and install the
third separate Unit test runner). You can also add it using Nuget if you have
that installed.
Some NUnit attributes and to assertions take
note of:
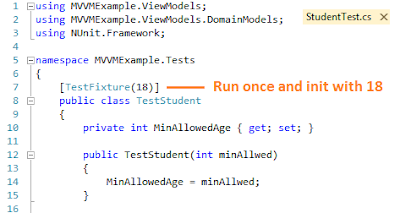
- TestFixture (This describes a class instance. You can have multiple instances of a test class executed by referencing them above the class)
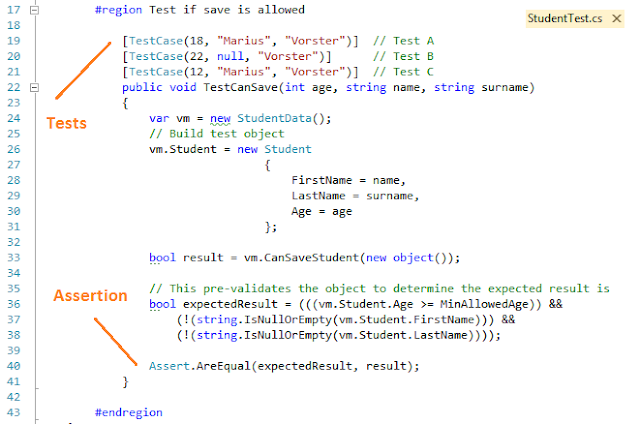
- TestCase (This will test a specific piece of logic)
- Equality Asserts (Checks whether the result should match or not )
* I am not using Mock objects in this tutorial but might want to also look into a blog on it here.
Create the Unit
Test Project
- Create a new Class Library project and name it with the same name as the WPF project with trailing .Tests (E.g. MVVMExample.Tests). This naming convention is standard for all unit test projects.
- Reference the .NET nunit.framework assembly for the new Class Library
- Rename the Class1.cs to StudentTest.cs define the following class:

-
Create a Unit test that executes multiple times with different values:

- Start NUnit and load the Test assembly (MVVMExample.Tests.dll) from the project bin folder.
- Right Click and select Run (All the tests should pass in this example):


No comments:
Post a Comment